In a SharePoint online tenant, you can find a search center already provisioned at the URL https://<Tenant>.sharepoint.com/search . This search center has a page for advanced search that can be found in the pages library - "Advanced,aspx" which facilitates users to search specifically for content in advanced mode. There can be a scenario where you want to provide your users with an advanced people search interface. This is not available Out of the box. In this post, we will walk through the steps to configure advanced people search for your SP online tenant.
These configurations might also work for SharePoint 2013 on premise, however I have only tested this in SP Online.
In a nutshell we are going to perform the following steps
1) Create a new advanced search page.
2) Edit the advanced search web part on that page to remove unwanted fields.
3) Add properties relevant to people search in the advanced search drop down.
4) Make the advanced search webpart navigate to people results.
5) Links this new advanced people search page to the people search web part.
So lets start. First we check if the "Advanced Search" page layout is available when we create new pages in the site.
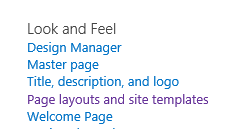
Navigate to the search center -> Site Settings -> Page layouts and site templates (Under look and feel section)
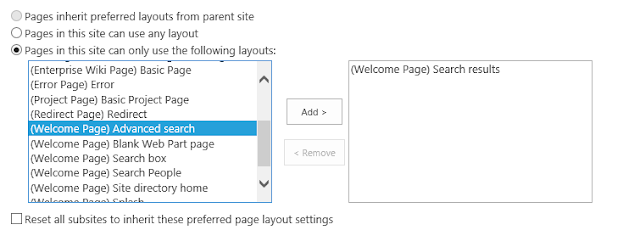
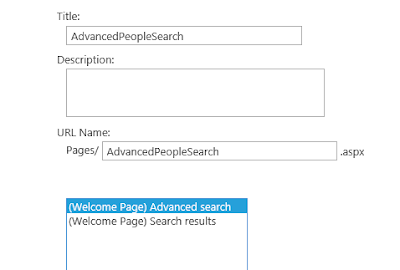
Add the Advanced search page layout to the available page layouts. Navigate to the pages library and create a new page with this page layout
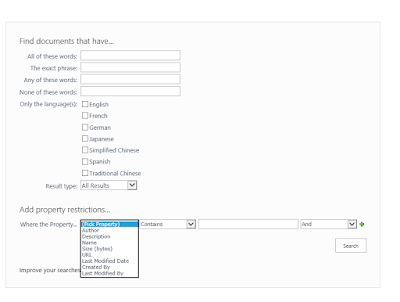
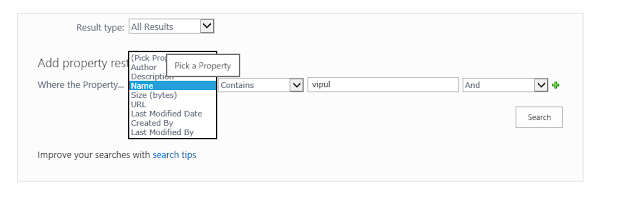
You will see a default advanced search web part on the page. There are a few properties which are populated by default in the drop down. There are also a few controls and language filter displayed. These are for the purpose of content search but we will get rid of all that in the upcoming steps
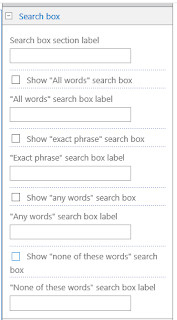
Now edit the page and edit the advanced search webpart. From the Search Box section of web part properties, un-check the check boxes as shown below
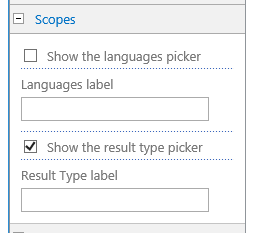
Also, from the scopes section, un-check the languages check box.
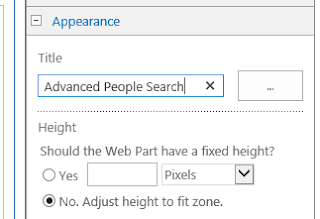
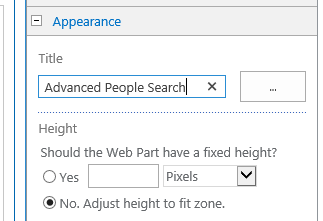
From the Appearance section, change the title of the web part to indicate that it is an advanced people search webpart.
Apply the changes, the extra controls which we did not need are now hidden. Since the properties in the drop down box are relevant for content and not to search people, we will modify these properties and add relevant properties such as "First Name", "Last Name", "Department" etc
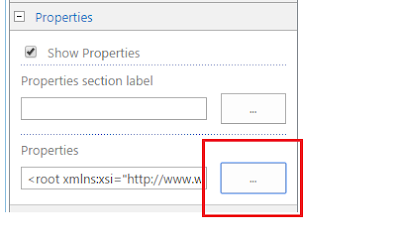
Edit the web part and open the properties section from the button as indicated below. It will open a dialog box and display XML text
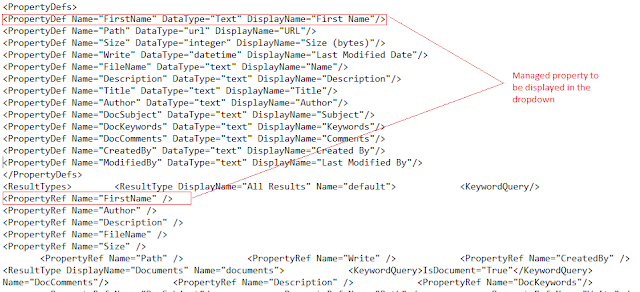
Copy the content and paste it in your favorite text editor, Look for the <PropertyDefs> node and the <PropertyRef> node. To search for people, we should have relevant properties in the drop down box for users to search on, For this, we need to add the Managed Properties in the drop down box.
Add a new <PropertyDef> node in inside the <PropertyDefs>.
Name - This is the name of the managed property
Type - This is the type of the managed property.
DisplayName - Specify the display name of the property in drop down.
Once this is done, add a <PropertyRef> node as shown in the image below. This will be reference to the property def we just added above.
Now copy and save the content in the "Properties" section of the web part and apply the changes to the web part. Once the changes are applies, the properties drop down will display our new property

Similarly you can add more managed properties and also remove the unwanted properties by by adding or removing the <PropertyDef> and <PropertyRef> nodes as desired
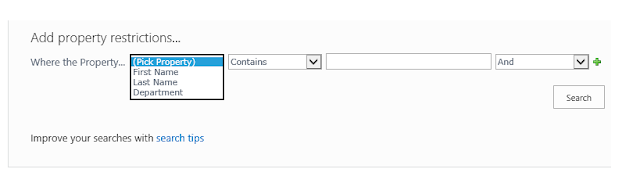
My properties dropdown looks something like this after adding FirstName, LastName and Department properties.
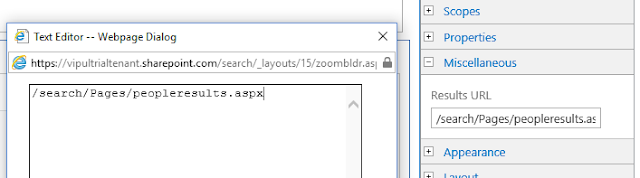
We are almost there, Now, since the advanced search webpart by default searches for content, it navigates to "/Pages/Reuslts.aspx" page to display content results when a keyword is searched. Since we want to search for people, we will make the webpart navigate to "/Pages/PeopleResults.aspx". To do this, edit the webpart and change the Results URL property from the "Miscellaneous" section.
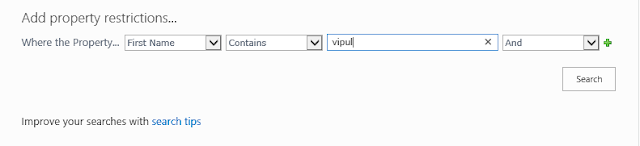
Now when you search on a property in the advanced search web part, the people results will be displayed.
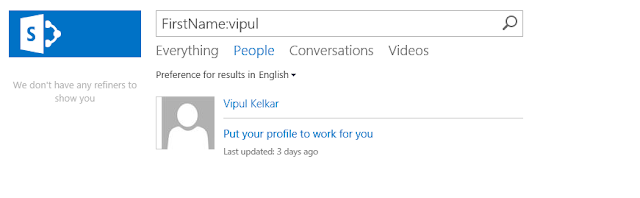
Search result -
I could not find a property to hide the "Result Type" drop down so this must be hidden through CSS or JavaScript

But how will users navigate to your new advanced people search page ? Easy. Open your PeopleResults.aspx page from the pages library and edit the people search web part. Enable the advanced link and add the name of the new advanced people search page.
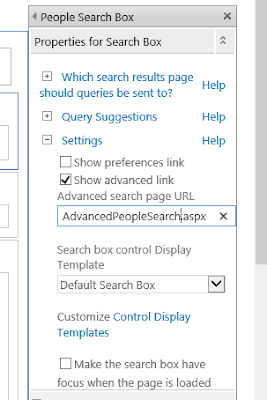
You'll see the "Advanced" link enabled on the search web part.

Hope this helps !
"
These configurations might also work for SharePoint 2013 on premise, however I have only tested this in SP Online.
In a nutshell we are going to perform the following steps
1) Create a new advanced search page.
2) Edit the advanced search web part on that page to remove unwanted fields.
3) Add properties relevant to people search in the advanced search drop down.
4) Make the advanced search webpart navigate to people results.
5) Links this new advanced people search page to the people search web part.
So lets start. First we check if the "Advanced Search" page layout is available when we create new pages in the site.
Navigate to the search center -> Site Settings -> Page layouts and site templates (Under look and feel section)

Add the Advanced search page layout to the available page layouts. Navigate to the pages library and create a new page with this page layout

You will see a default advanced search web part on the page. There are a few properties which are populated by default in the drop down. There are also a few controls and language filter displayed. These are for the purpose of content search but we will get rid of all that in the upcoming steps

Now edit the page and edit the advanced search webpart. From the Search Box section of web part properties, un-check the check boxes as shown below

Also, from the scopes section, un-check the languages check box.
From the Appearance section, change the title of the web part to indicate that it is an advanced people search webpart.
Apply the changes, the extra controls which we did not need are now hidden. Since the properties in the drop down box are relevant for content and not to search people, we will modify these properties and add relevant properties such as "First Name", "Last Name", "Department" etc

Edit the web part and open the properties section from the button as indicated below. It will open a dialog box and display XML text

Copy the content and paste it in your favorite text editor, Look for the <PropertyDefs> node and the <PropertyRef> node. To search for people, we should have relevant properties in the drop down box for users to search on, For this, we need to add the Managed Properties in the drop down box.
Add a new <PropertyDef> node in inside the <PropertyDefs>.
Name - This is the name of the managed property
Type - This is the type of the managed property.
DisplayName - Specify the display name of the property in drop down.
Once this is done, add a <PropertyRef> node as shown in the image below. This will be reference to the property def we just added above.

Now copy and save the content in the "Properties" section of the web part and apply the changes to the web part. Once the changes are applies, the properties drop down will display our new property

Similarly you can add more managed properties and also remove the unwanted properties by by adding or removing the <PropertyDef> and <PropertyRef> nodes as desired
My properties dropdown looks something like this after adding FirstName, LastName and Department properties.

We are almost there, Now, since the advanced search webpart by default searches for content, it navigates to "/Pages/Reuslts.aspx" page to display content results when a keyword is searched. Since we want to search for people, we will make the webpart navigate to "/Pages/PeopleResults.aspx". To do this, edit the webpart and change the Results URL property from the "Miscellaneous" section.

Now when you search on a property in the advanced search web part, the people results will be displayed.

Search result -

I could not find a property to hide the "Result Type" drop down so this must be hidden through CSS or JavaScript

But how will users navigate to your new advanced people search page ? Easy. Open your PeopleResults.aspx page from the pages library and edit the people search web part. Enable the advanced link and add the name of the new advanced people search page.

You'll see the "Advanced" link enabled on the search web part.

Hope this helps !